 DoubleKiller » Tour
This product tour demonstrates the settings and operation of
DoubleKiller by performing an example scan, illustrated with
screenshots.
Page 4/5
Managing the results
When the scan is finished, the result list and buttons are enabled.
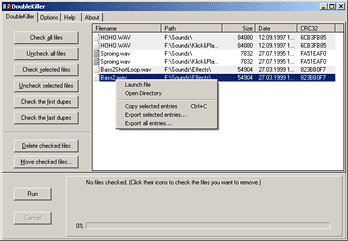
Mark files for removal
The file icons next to each entry help to distinguish between the sets of duplicate
files: they alternate between dark and bright every other set, as do the backgrounds.
Additionally they act as checkboxes. Every file you check by clicking its icon
will be deleted when you click "Delete checked files".
Check files automatically
To the left of the result list you can find a number of buttons that automate
the task of checking files. For example you can mark multiple files with the
mouse and check all these files at once by clicking "Check selected files".
Clicking "Check the first dupes" automatically checks the first file
of every pair, the first two of every triple etc. DoubleKiller
Pro also allows to check files dependant on their filename, path, date or
size and offers sorting and regrouping functions, enabling you to automatically
check e.g. the oldest files of each set.
View files
By doubleclicking an entry the corresponding file is opened/executed and using
its context menu (right mouseclick) you can also open the directory it is located
in.
Exporting results
It is also possible to export the result list to a textfile readable by both
humans and your favourite spreadsheet application like OpenOffice.org Calc or
Microsoft Excel. To do so, right-click the result list and choose "Export
all entries...". In DoubleKiller Pro
you can even export the results to a binary file that can be reloaded any time
later.
|


